Tuesday, January 21, 2014

My Little Snowflake ~ Scraps of Darkness

I have one final layout created with the Scraps of Darkness December "Winter Wonderland" Kit to share with you today. I had this precious photo of my little guy all bundled up in his Tigger snowsuit when he was a baby and hadn't scrapped it yet - so here we have "My Little Snowflake".
I primarily used the Authentique "Glistening" collection for this layout - but have also used two pieces from the Bo Bunny Misc. Me Contents pages (Embellishment Add-On) in my layering.  I started out by creating the "divided" base by gluing a 6"x12" piece of the Authentique Glitter paper to the bottom of the Dazzle paper. I then used a Martha Stewart deep edge punch for the two punched border strips across the centre of the layout. Finally, to finish off the base, I used a Prima 12 x 12 mask and some Liquitex White Opaque Flakes medium to give it the look of a snow flurry. Here is a close-up of the masking.
I added a die-cut Misc. Me piece and fussy-cut a second Misc. Me paper to layer under the photos. I used Authentique Cardstock Stickers for the title and also for one of the banner elements - I cut additional banner pieces, using the Authentique Sticker as the template, and glued them onto pieces of wired burlap ribbon.   I raided some leftovers from older Scraps of Darkness Kits for the flowers, resin feathers and burlap bird that embellish the layout.
I was inspired to create this layout by this month's challenge, specifically the colours in the mood board, at Scrap Around the World!
Thanks so much for stopping by my blog today - I'll have some new projects created with the incredible Scraps of Darkness January "Style and Sophistication Kit" to post soon!
Happy Scrapping!

Thursday, January 16, 2014

Lindy's Stamp Gang and Imaginarium Designs Blog Hop!

Welcome to the MASSIVE Imaginarium Designs and Lindy's Stamp Gang Blog Hop!

We are so excited to have the team at Lindy's team up for a full day of creativity.

This hop will surely get your creative juices flowing so head on over to all these incredibly talented crafters to check out how they've combined the beautiful products from Lindy’s Stamp Gang with our fabulous chipboard, it’s a match made in color heaven!

We have a great prize for you too!

We would love for you to show some love to all our crafters and leave them a little message

You will have the opportunity to win a fabulous prize by both Imaginarium Desings and Lindy’s Stamp Gang so please let us know that you have done so by going to the Lindy’s Stamp Gang and Imaginarium Designs blogs at the end of the hop.

Here is a full list if you get lost along the way:
  1. Amy Voorthuis
  2. Denise Boddey
  3. Evgenia Sokolinskaya
  4. Ingrid Gooyer
  5. Kaori Fujimoto
  6. Karen Zueger
  7. Louise Nelson
  8. Sandrine Dawes
  9. Maiko Miwa
  10. Natalie May 
  11. Julianne McKenna-De Lumen
  12. Patricia Basson
  13. Sarah Routledge - YOU ARE HERE!
  14. Shell Carman
  15. Solange Marques
  16. Cindy 
  17. Nolwenn 
  18. Ivett 
  19. Irina 
  20. Lynne 
  21. Mary
  22. Limor 
  23. Lindy's Stamp Gang - http://lindystampgang.wordpress.com
  24. Imaginarium Designs - http://imaginariumdesigns.blogspot.com/
~~~~~~~~~~~~~~~
Here is my project - a mixed media canvas featuring my gorgeous little boy!
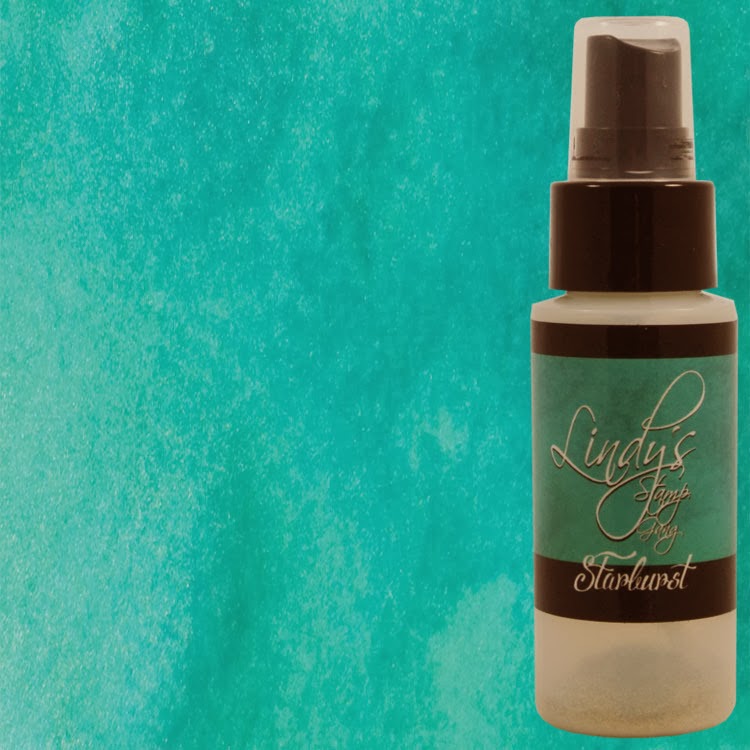
To create the background, I started with The Crafter's Workshop 12 x 12 Time Travel template and modeling paste. I then added three different sizes of Imaginarium Designs Hexagons. I then misted the canvas with lots of Lindy's Stamp Gang Starburst mists in Time Travel Teal, Rusty Lantern Lime, Edelweiss Moss Green, and Afternoon Delight Denim. Once all the misting had dried, I dry-brushed the hexagons with some white gesso to soften the colours on them. Then it was time to start building my layout!
I wanted it to look like my son was standing in a garden, so I started with some cheesecloth, which I misted with the Lindy's Stamp Gang Time Travel Teal and Rusty Lantern Lime Starbursts so that it would look like a grassy/mossy base. I then added a fussy-cut photo of my son and a combination of Prima/Petaloo flowers (leftover from past Scraps of Darkness kits). I cut up the Imaginarium Designs Silver Leaf Fern Chipboard and embossed the pieces with Lindy's Stamp Gang Embossing Powder in Hyacinth Blue Jade and then tucked them into the flower cluster. I also cut the Imaginarium Designs Compass and Clock in half and embossed it with the same embossing powder.
I used the Imaginarium Desgins small "A Moment in Time" phrase as the title and embossed it with Lindy's Stamp Gang Embossing Powder in Midnight Sapphire - I love how this dark blue pops against the misted cheesecloth! In this photo, you also see the other half of the Compass and Clock embossed with the Hyacinth Blue Jade embossing powder.

I hope you enjoyed this stop on our fantastic blog hop - your next stop on the hop is Shell Carman's blog! Have Fun Hopping!
~~~~~~~~~~~~~~~
Imaginarium Designs Chipboard Used
Hexagons - IDS0069

Silver Leaf Fern - IDFL0015

Clock and Compass - IDS0062

"A Moment in Time" Phrase (small) - IDP0037

Lindy's Stamp Gang Products Used
Time Travel Teal Starburst

Rusty Lantern Lime Starburst


Hyacinth Blue Jade Embossing Powder

Midnight Sapphire Embossing Powder

Other Materials Used:
Scraps of Darkness Kits: Prima Flowers - Serenity; Petaloo Flowers - Darjeeling Collection - Wild Butterflies, Faux Dried Mums, Flor Alophemera Purple
Personal Stash: Artist's Loft 12 x 12 Canvas, The Crafter's Workshop 12 x 12 Template - Time Travel; Golden Light Molding Paste; Pro Art White Gesso; Cheesecloth. 

Saturday, January 11, 2014

Snow Angel ~ Scraps of Darkness

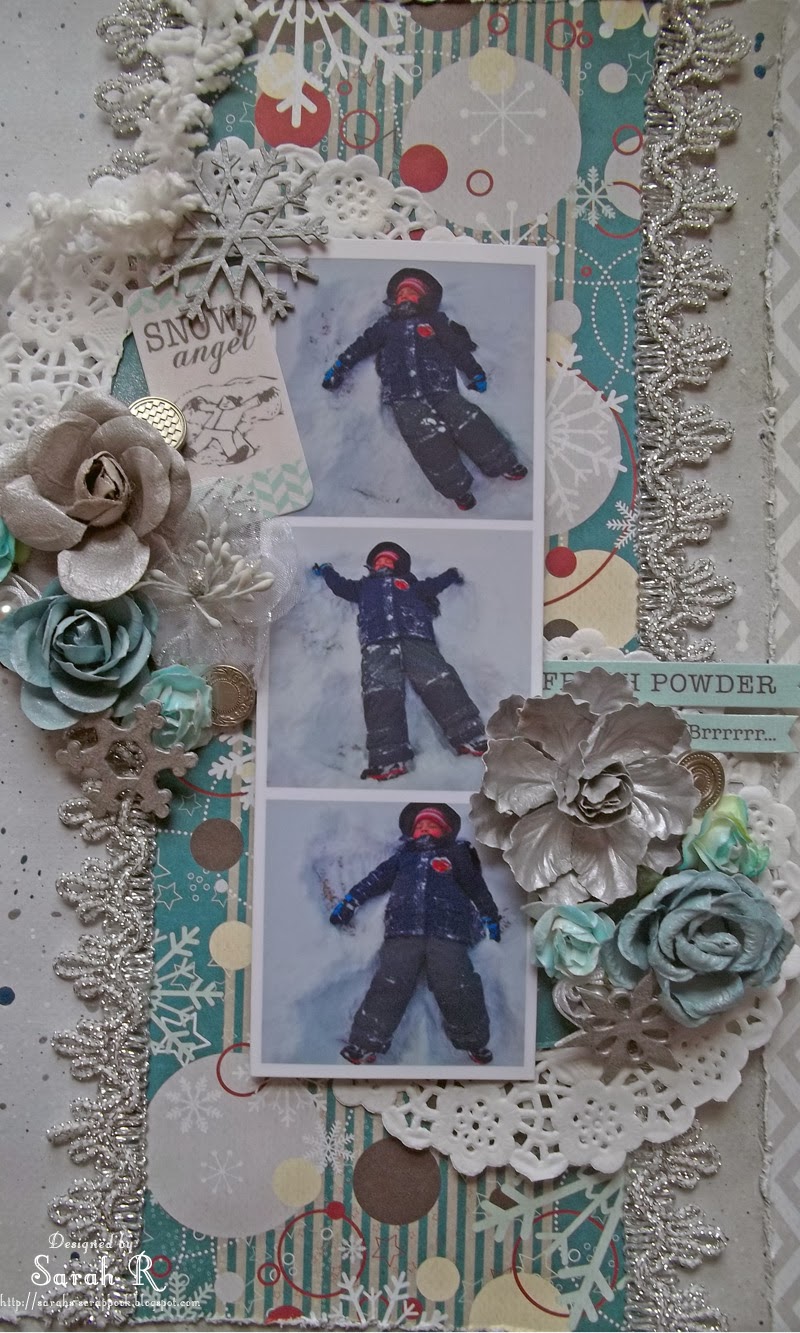
Hello Scrappy Friends! I have a fun layout to share with you today - created with the Scraps of Darkness December "Winter Wonderland" Kit! I've used the Fancy Pants Designs "Timbergrove" papers to create this layout featuring photos of my son making a Snow Angel this winter!
I started out with the Frolic chevron-patterned paper as the base and then used the reverse side (a light grey) as the second layer and paint-splattered it using watered-down gesso, as well as two of the Silks Acryclic Glazes (Silver Bells and Bolivian Blue) included in the Colour Add-on.
I cut out the central pattern from the Flurries paper and used it as the vertical strip to anchor my photos and embellishments and added the Silver lace from the Embellishment Add-on along the vertical sides. I cut two circles from the leftover Flurries paper for the centre of the doilies. For the photos, I created an "Instagram" photo strip using Photoshop Elements to play upon the vertical lines of the layout.
Finally, I used a combination of flowers (Prima, Petaloo and Kaisercraft) from the Main Kit and Flower Add-On, some Authentique Cardstock stickers (painted with Silks Acrylic Glaze in Ice), Leaky Shed Studio Chipboard snowflakes (painted with Gesso and Silks Acrylic Glaze in Silver Bells), as well as some Farmhouse Studio brads to create the flower clusters.
Thanks so much for stopping by my blog today - hope you enjoyed this fun layout!

Friday, January 10, 2014

Mixed Media Gift Tag and a Tutorial ~ Scraps of Darkness & Imaginarium Designs

I am back with a second project for you this month combining the Scraps of Darkness December 2012 Kit with Imaginarium Designs Chipboard! Today, I am sharing a mixed media gift tag and a tutorial! I had lots of fun making this cute winter tag using the Bo Bunny "Woodland Winter" collection and Luminarte Silks Acrylic Glaze from the SOD kit, along with an Imaginarium Designs chipboard tree and sentiment!

First, I painted a white #8 shipping tag with the Silks Glaze in Bolivian Blue. I then masked some "snow" on the bottom of the tag using a Prima 12 x 12 stencil and some Light Molding Paste mixed with DecoArt SnowTex. I fussy cut the snowman from the Bo Bunny paper and added some of the Molding Paste/SnowTex mixture to the bottom of the snowman. I cut the snowflake circles from one of the Bo Bunny cardstock stickers (they were originally part of a border sticker) and added them randomly around the tag. I also used the awesome fur trim from the kit at the top of the tag - I threaded it through the tag's hole and glued the trim together and, once dry, I cut it into strips.
For the "Just for You" sentiment, I simply painted the chipboard with two coats of Luminarte Silks Acrylic Glaze in Silver Bells.
I used a couple of different techniques to create this snowy tree - so I thought I would share the process with you!

Snowy Tree Tutorial
Supplies:
  • Imaginarium Designs Christmas Tree
  • Luminarte Silks Acrylic Glaze - Silver Bells, Ice
  • Golden Light Molding Paste
  • DecoArt SnowTex
  • Luminarte Primary Elements Pigments -
    Forest Green and Bolivian Blue
  • Palette Knife
  • Needle
  • White Gesso

Mediums:
Before starting to alter the chipboard Christmas tree, you'll need to prepare your mediums:
  • First, mix together equal parts of the Molding Paste and SnowTex (the SnowTex is quite coarse and adding the molding paste makes it easier to spread)
  • Second, separate half of molding paste/SnowTex mixture into a second container - add Luminarte Primary Elements pigments to colour the medium. I wanted a green colour with a hint of blue, so I have used Forest Green and Bolivian Blue. (Add a little bit of each medium at a time until you achieve the colour you want.)
Altering the Chipboard Tree
Now you're ready to create your snowy tree! I've provided a step-by-step photo tutorial below!

Imaginarium Designs Chipboard Used
 Christmas Tree Board
IDS0008

"Just For You" Phrase
IDP0074

Other Products Used
Scraps of Darkness - December 2013 Winter Wonderland Kit - Patterened Paper - Bo Bunny "Woodland Winter" collection - Scarf and Cardstock Stickers; Luminarte Silks Acrylic Glaze - Ice, Silver Bells and Bolivian Blue; Wrights 1" Fur Trim.
Personal Stash - White #8 Shipping Tag; Prima 12 x 12 Stencil ; Golden Light Molding Paste; DecoArt SnowTex; Luminarte Primary Elements Pigments - Forest Green and Bolivian Blue; Claudine Hellmuth Studio Gesso; Aleene's Tacky Glue; Beacon 3-in-1 Glue; 3D Foam Adhesive.
~~~~~~~~~~~~~~~
Don't forget that Imaginarium Designs is looking for new Designers - check out the DESIGN TEAM CALL for more information.

That's it for me today! I hope you liked my tag and found my tutorial helpful! Don't forget to leave a comment on my post on the Imaginarium Designs blog for a chance to win some Imaginarium Designs Chipboard Products!

Sunday, January 5, 2014

Bittersweet 2013 ~ Scraps of Darkness & Imaginarium Designs

Today, I am sharing a personal layout based on the January Sketch at Once Upon a Sketch. The journalling theme at OUAS is "Lessons Learned" and I've chosen to add private journalling to the back of my layout about my personal journey in 2013. I've used the Bo Bunny Winter Woodland paper and stickers, as well as the Prima Flowers included in the Scraps of Darkness December 2013 "Winter Wonderland" Kit to create this layout! I chose a picture of some Bittersweet from my garden that was covered in ice and snow following  an ice storm we had just before Christmas. I decided to go with a monochromatic theme so that the only colour on the layout is the pop of orange of the bittersweet berries in the picture.
Here is a close-up of the layering/photo-cluster. I started off by doing some masking with a Crafter's Workshop mask and Light Molding paste. I cut squares/rectangles from the Journal sheet of the Bo Bunny paper and also added squares of burlap from my stash to the layering under the photo. I brushed the Prima flowers with white gesso to coordinate them with the chipboards.
I love how the Imaginarium Designs Chipboard Branches and Leaves with holes sort of looked like the Bittersweet brances - they were the perfect complement to the photo on this layout. I wanted to keep the branches fairly plain to go with the monochromatic colour scheme, so I simply dry-brushed the chipboards with gesso and then added some thick gesso to the top edges of the chipboards to look like snow.
Imaginarium Designs Chipboard Used
 Branch and Leaves with Holes
IDDN0013
Branch and Leaves with Holes Balanced
IDDN0014

Other Products Used
Scraps of Darkness - December 2013 Winter Wonderland Kit - Patterened Paper - Bo Bunny "Woodland Winter" collection - Journal and Cardstock Stickers; Prima Flowers - La Tela.
Personal Stash - Cardboard, The Crafter's Workshop 6 x 6 Mask - Mini Cell Theory; Golden Light Molding Paste; Burlap,;Claudine Hellmuth Studio Gesso; White Floral Wire.
~~~~~~~~~~~~~~~
Don't forget that Imaginarium Designs is looking for new Designers - check out the DESIGN TEAM CALL for more information.

That's it for me today! I hope you liked my simple, monochromatic layout! Don't forget to leave a comment on my post on the Imaginarium Designs blog for a chance to win some Imaginarium Designs Chipboard Products!

Friday, January 3, 2014

"We Shall Find Peace..." ~ Scraps of Darkness

Happy New Year and welcome to my first post of 2014. Today, I am sharing a layout created with the outstanding Scraps of Darkness December 2013 Winter Wonderland Kit. My layout shows a photo of my son amid some of the branches that came down during the ice storm we had just before Christmas. This layout is based on the SOD Sketch designed exclusively for this Kit by Suepup! Here is my layout:
And here is the December Kit sketch:
I used the gorgeous Authentique "Glistening" collection papers to create the layout and heavily distressed the edges of all the papers. I also added in two 5.5-in. doilies from my stash to create the layers. I had a great time experimenting with lots of different ways to create snow-effects on this layout! Here are the different ways I created the snow on the layout:
  1. The sparkly snow on the larger layers is a combination of heavy gel medium and Martha Stewart Sparkle Texture Effect - I simply added this to the layering with a palette knife.
  2. The snow on the window (a Tim Holtz die cut shape) is a combination of the Marvy Uchida Snow Marker and the Icicle Stickles from the Kit. 
  3. The snow on the snowflakes (also Tim Holtz die cuts) is a combination of DecoArt Snow-Tex and then Icicle Stickles on top.
  4. On the Kaisercraft flowers from the Main Kit, there is a combination of thick gesso, followed by Icicle Stickles.
  5. Finally, the tree was first treated with Distress Ink in Vintage Photo and then with the Snow Marker. Unfortunately, the ink bled through the snow, giving it an unfortunate "yellow snow" appearance. Yuck. So, I touched it up with the white gesso and added Icicle Stickles to salvage it.
 These look so much better in real life - but here is a close-up so you can see all the different effects!

Finally, I used one of the Authentique cardstock stickers, matted on some of the black patterned paper from the Glistening collection for my title and tucked another cardstock sticker into the snowflake/flower cluster. 
This kit is so lovely to work with - I just love it and can't wait to get back to it. I'll be back soon with more projects to show you!

Happy Scrapping!


Monday, December 30, 2013

This Moment Card & Watercolor Flower Tutorial ~ Scraps of Darkness

I have a quick post to share with you tonight of a card I made using the Scraps of Darkness November Kit. I am not a card maker at heart - but I wanted something simple to showcase the watercolored flowers I made, so I used a Prima paintable card (also painted with watercolors), the dragonflies and some ribbon from the SOD kit and some gold embellishments (actually a piece of a Christmas garland) and gold embossing powder from my stash to create this simple card.
Here is a close-up of the watercolored flowers - I used white Prima flowers and LuminArte Twinkling H2O watercolors to alter them.
~~~~~~~~~~~~~~~
Watercolor Flower Tutorial
I find when I want to alter the color of flowers, spray mists are usually my go-to medium; however, I always find that it takes a lot of spray to get into all the layers of the flowers, so I wanted a better way to alter flowers than over-using my mists! Here is my solution - altered flowers using Twinkling H2Os by LuminArte - you still get the lovely shimmer that is possible with mists, but it uses so much less product and it is much easier to paint between the layers with a paintbrush than trying to spray them!
Thanks for stopping by my blog today. I'll have some new projects to share using the Scraps of Darkness December Kit "Winter Wonderland" in the New Year!

Sunday, December 15, 2013

Your Angry Face ~ Scraps of Darkness

I have a layout created with the Scraps of Darkness November Water Lilies Kit to share with you today. I used the 7 Dots Studio 9th Wave papers from, as well as some of the Canvas Corp White Tissuestock (scrunched) to create the torn, grungy layering for this layout. I also had some fun with mediums on this layout and have included masking with molding paste, stamping and misting (with the awesome Lindy's Stamp Gang Mists included in the Kit and Colour Add-on)!  I caught a picture of my son's "angry face" the other day and thought it was too cute not to scrap!
(Sorry it looks like the photo is crooked on the layout - the page warped due to the media and it was impossible to get it flat enough in time for the picture!)

I used the Glitz Design Stickers for my title and trimmed one of the Pink Paislee Color Wash tags for under the photo - I misted the tag and then, once it was in place, outlined inside the word with a black Aquarellable pencil (by Stabilo).
Here, you can see a close-up of the misting, stamping and masking. I used a checkered mask and stamp by Finnabair for Prima. The mists are Lindy's Stamp Gang Flat Fabio in Curioser Chartreuse and Starbursts in Tea Pot Purple and Down the Rabbit Hole. I also used some diluted Black Soot Distress Re-inker for the black misting.
Thanks so much for visiting my blog today! I still have one more project to share with the Scraps of Darkness November Kit and it will include a short tutorial - so be sure to watch my blog in the next couple of days for that!