

1. Paint the plain wooden house using an acrylic craft paint in Antique White.

2. a. Cut a strip of paper the height of the main 'body' of the house and punch a hole for the bird-perch.
b. Mod podge the back of the paper strip and adhere it to the birdhouse.
c. For the large hole in the birdhouse, I simply cut a starburst pattern into the paper and folded the points inwards.
d. Finally, coat the paper with Mod Podge.

3. a. Punch out a heck of a lot of leaves - I used the Martha Stewart Rose Leaf punch.
b. Curl the edges of the leaves- I used a thin paintbrush.
c. Attach the leaves in graduating layers using liquid glue.

4. a. Brush the tips of the leaves with mod podge and sprinkle on glitter. I used DecoArt Glamour Dust - it is so pretty and very fine (and unfortunately doesn't show up well in the photos).
b. "Stamp" the perch and white edge of the base with Perfect Medium and Brush on Perfect Pearls (I used Green Patina).
c. You'll also notice that I wrapped some ribbon around the edge of the birdhouse where it meets the base - I thought this gave it a nicer finish at the edge. I used the same ribbon at the top of the birdhouse for the hanging loop.

5. a. Fussy Cut a fairy from an 8x8 sheet of the Once Upon a Springtime paper.
b. Coat Fairy with Mod Podge and adhere to birdhouse with 3D foam adhesive.
c. Add floral embellishments - I used the Spellbinders Shapeabilities Bitty Blossom die to create the roses for the fairy house. I simply wrapped them around a paintbrush to roll them into the size/shape I wanted and then used a glue dot to keep them together. I added a pearl bead to the centre of each flower.
d. Add other embellishments using Mod Podge - I used the "Once Upon a Springtime" tag elements for the tag, "title" piece and round postmarks.
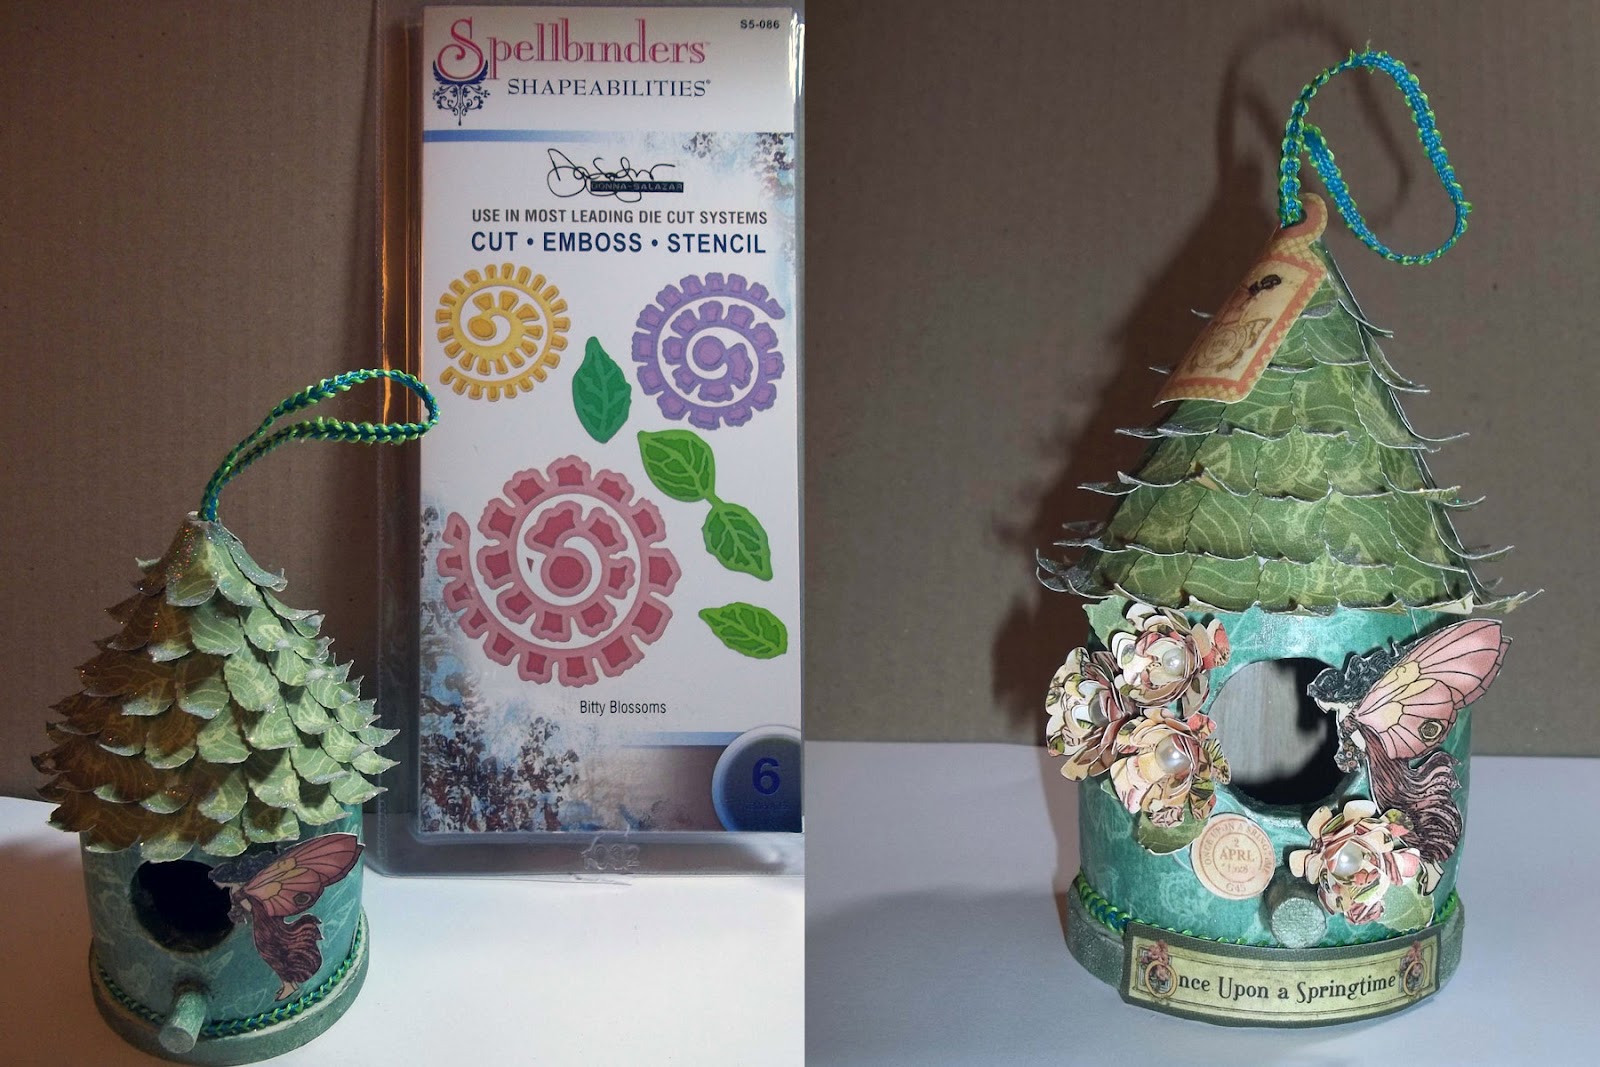
Here are a couple of photos of the final Fairy House from different angles!

Thanks so much to Pam for having me as a guest on her blog! I had so much fun with this project that I think I might make a couple more and create a little set!

Materials Used:
Patterened Papers - Graphic 45 Once Upon a Springtime Collection - 12x12 Once Upon a Springtime, Enchanted Forest, Butterfly Kisses, Tags; 8x8 Once Upon a Springtime; Simply Surfaces Mini Birdhouse; DecoArt Acrylic Craft Paint - Antique White; Celebrate It Ribbon; Spellbinders Shapeabilities Die Bitty Blossoms; Jenni Bowlin Studios Pearl Beads; Perfect Pearls Pigment Powder - Green Patina; DecoArt Glamour Dust; Mod Podge - Matte; Glue Dots - Mini and Craft
3 comments:
Very creative! I love how you did the roof!
Yes, that roof is awesome. I didn't realize it was a wood bird house.
This is just gorgeous! I love this particular range from Graphic 45, and love how you've use it.
Post a Comment