Showing posts with label Vintage. Show all posts

Wednesday, November 21, 2018

Shabby Chic Christmas Altered File Folders ~ Creative Embellishments

Hi there Crafty Friends! Today I'm sharing a Shabby Chic Christmas project with you - using gorgeous chipboard elements from Creative Embellishments! Like all of you, I'm sure, I've started getting ready for Christmas - and decided to create these Altered File Folders as packaging for Christmas Gifts! I coffee-dyed a standard letter-size file folder and then cut it in half - sewing the sides of each half closed to create a pocket. I layered vintage music paper, vintage dictionary paper, some coffee-dyed paper doily, and some pages from Charles Dickens' A Christmas Carol on the folders and then added some vintage pink velvet ribbon and some vintage pink & white floral lace. I printed the angel images (a free printable I found on Pinterest), distressed them with Vintage Photo Distress Ink and stitched them to some coffee-dyed paper and white cheesecloth. I added three buttons, stitched with silver thread, to each printed image. I added a CE chipboard Pine Tree to each folder - I embossed the trees with Stampendous Embossing Powder in Winter Wonderland. I also added a CE chipboard Bow to each folder - I embossed the Bows with Distress Embossing Powder in Worn Lipstick, but didn't like the colour tone on this project, so I painted over it with some Prima Art Alchemy Metallique Paint in Vintage Rose and added some highlights with Smooch Pearl Accents. Finally, I embossed words from the CE Chipboard Christmas Sentiments with Martha Stewart Embossing Powder in Sterling - I used silver to pick up on the silver flecks on the trees and the silver thread in the buttons.


I've left the back of the folders fairly plain (for now!) - simply adding a small collage of vintage music paper, book page and lace at the top and randomly stamping the folders with my favourite CE Stamp - Distressed Script.

Wednesday, November 14, 2018

Writing Boards for Vintage/Junk Journals ~ Creative Embellishments

Hi There Crafty Friends! Today I'm sharing a fun and functional projectwith you! I've been creating Vintage Style Junk Journals lately and wanted to include a writing board in them -- a hard surface for those who like to journal on the go -- and the Creative Embellishments Large Tags are the perfect size to tuck into a journal for this purpose! For the "writing surface" side, I wanted to make sure that it remained flat, without any bumps or embellishments that would interfere with writing, so I started off by brushing a rough coat of white gesso on one side of the tag - leaving some places where the kraft colour of the tag base could peek through. Next, I stamped the tag with the Creative Embellishments Distressed Script Stamp and some black Archival Ink. I then decoupaged torn sections from a Paris-themed Napkin onto the tag. Finally, on the writing side, I heavily inked the edges of the tag with Distress Ink in Vintage Photo.

For the reverse side of the tags, I created some "Franken-Paper" using bits of paper left over from creating the journals these tags were created for (check out Nik the Booksmith's YouTube for the inspiration for the Franken-Paper technique). I collaged the papers together and then cut the tag shapes from the collaged paper. Next, I stitched around the outside of each tag shape and along each seam of the papers; then, I added some lace that coordinates with some used in the journals. Before gluing the sewn/collaged papers to the Large Tags, I added a Pen Loop to each of the tags using wide black elastic. Finally, I glued the collaged papers to the back of each tag and inked the edges with Distress Ink. I finished off the tags with some lace, sari silk and eyelash trim and an antique-style pocket watch charm.

Thursday, March 1, 2018

Paris c. 1900 - A Cancan Dancer's Diary Vintage/Junk Journal ~ Digital Kit Available in My Etsy Store

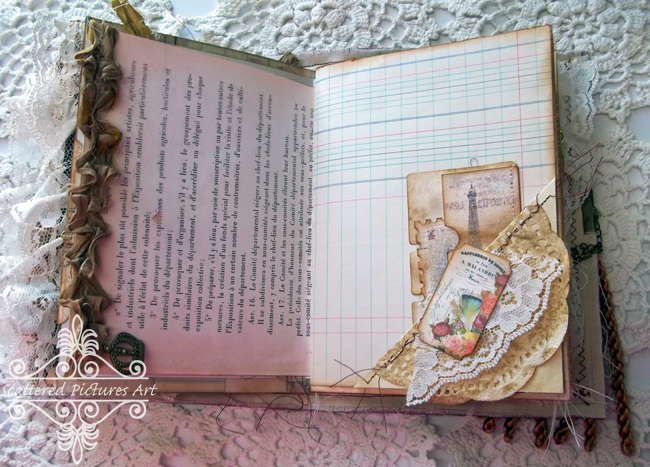
Hi there Crafty Friends! I created this journal for a Swap in the Junk Journal Junkies Facebook Group and I'm so excited to share it because it was made using the first Digital Journal Kit I designed for my Etsy Store! The Kit is called Paris c. 1900 - A Cancan Dancer's Diary and was inspired by Paris at the turn of the 19th century and features designs based on the Paris 1900 Exhibition and the Moulin Rouge.

There is a flip-through of the completed journal on my YouTube channel.
And here are a few pictures!


Saturday, January 20, 2018

Vintage French Tags ~ Creative Embellishments

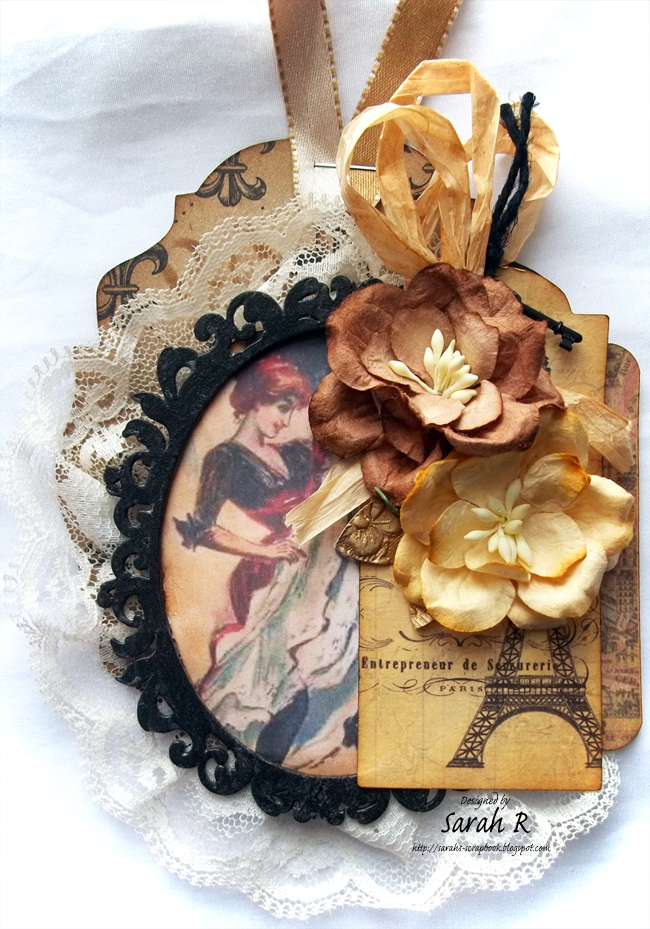
Hi There! Today I'm sharing a pair of Vintage French Tags created using two of the small Fancy Oval Frames from Creative Embellishments and papers/embellishments from Canvas Corp Brands. All the papers are inked with Distress Ink in Vintage Photo.
I used the Tim Holtz Baroque Die to cut the base of the tags from a sheet of Canvas Corp Black and Kraft Fleur de Lis paper.   I printed the vintage Cancan dancer images and used the Creative Embellishments Frames on them. I painted the frames with Black Acrylic Paint and added a very fine crackle texture on them. I used a 7 Gypsies Junque Pack to create the paper layers and small tags. I added some 7 Gypsies Rub-ons and Miniature Keys to embellish the tags, as well as some paper flowers from Wild Orchid Crafts and some raffia, lace and twine from my stash. Finally, I punched some leaves from some scraps of Canvas Corp Embossed Burnished Floral paper that I had left in my stash and added them to the flowers. Here is a close-up of each tag:


Saturday, December 9, 2017

Believe - Baby's 1st Year December Layout ~ Creative Embellishments

Hi there Crafty Friends! Today I'm sharing another layout in my Baby's First Year series - created for the Creative Embellishments Design Team! Once again, I've used a combination of several Graphic 45 paper collections (A Place in Time, Children's Hour, Place in Time, and St. Nicholas) to create this layout - keeping with the theme I'm using throughout the 12 months of the album!
I've used the CE Chipboard Holly and Berry Flourishes and the Believe title from the Inspire Word Set on this layout. I painted the chipboard elements with Prima Art Extravagance Metallique Acrylic Paints and inked them with some Vintage Photo Distress Ink. I added Crackle Accents to the Holly Branches and Glossy Accents to the Holly Berries. Here is a close-up and a couple of different angles so you can see all the details and layers.


Tuesday, November 21, 2017

Junk Journal Style December Daily ~ with Video Flip Through

Hi there Crafty Friends! Today, I have a new journal to show you - a  Junk Journal Style December Daily. I made this journal using the Creative Embellishments Personal Journal Cover and Maja Design It's Christmas Time papers. The Maja Designs November Mood Board was the perfect inspiration to get some holiday crafting done!
I have a few pictures of the journal below, but to see all the details make sure you check out the Video Flip Through on my YouTube Channel!


Saturday, July 15, 2017

Portrait of a Lady Victorian Fan ~ Creative Embellishments

Hi There! I have a new altered project to share today! I have used one of the gorgeous new Creative Embellishments Chipboard Victorian Fans, along with Graphic 45's Portrait of a Lady collection to create this elegant Portrait of a Lady Victorian Fan!
I started by joining the fan pieces together using cream coloured ribbon. Then I covered both sides of each fan piece with papers from the Portrait of a Lady collection (12x12 Patterned Paper and 12x12 Patterns and Solids). I inked the edges of all the paper with Distress Ink in Old Paper. I fussy cut portraits and flowers from the 12x12 and 8x8 patterned papers to decorate the front of the fan and used three Mini Frames and two Door Knockers to mount the fussy-cut portraits on each of the fan pieces. I embossed the frames and door knockers with Stampendous Aged Ivory Embossing Enamel. I also added a string of half pearls around the mini frames on two of the portraits. I finished off the Fan with a Tasseled Wrist Strap, a floral charm, a mirrored charm and a Graphic 45 Chipboard Element from the collection. Here are some more photos and close-ups!


Monday, May 29, 2017

Vintage Tags ~ Creative Embellishments

Today, I'm sharing two Vintage Tags with you, which I created using fantastic stencils and chipboard from Creative Embellishments! I wanted to challenge myself to create some mixed media tags on a black background - and these are the result! I used the Tim Holtz Alterations Tag Collection Die to cut the tags out of heavy black cardstock and black drawing paper. I glued the drawing paper tags on top of the cardstock ones, leaving the edges loose so I could curl/fold them up for a more distressed/vintage look. I dug into my stash and used papers from Graphic 45's gorgeous Renaissance Faire collection for the layering/images on the tags. Scroll down for more details about each tag!
On the first tag, I've used: the Paris Postmark Stencil, a crown from Crown Set 2, an Arched Window, and a Square Mini Frame. I started by stenciling the Paris Postmark using Prima Art Basics Modeling Paste. I used cut-outs and a fussy cut image from the Graphic 45 Renaissance Faire collection to create the layers on the tag - inking all the paper edges with Distress Ink in Ground Espresso. I added pieces of cheesecloth that I dyed black using Dylusions Ink in Black Marble. I cut the arch off of the Arched Window - using the rectangular section over the fussy-cut image and saving the arch to tuck into the layers. Then, I cut apart one of the Square Mini Frames - adhering the ornate corners to the back of the rectangular window's corners to create an ornately framed window! Next, I primed all the chipboard pieces using Prima Art Basics Heavy Black Gesso. I added Prima Art Extravagance Limestone Stone Effect Paste to the Arched Window and Frame pieces. Once the Stone Effect Paste was dry, I sponged on some more Black Gesso. Then, I used three Prima Art Alchemy Waxes to add colour to the chipboard pieces - White Gold Metallique Wax, Vintage Gold Metallique Wax, and Red Amber Antique Brilliance Wax. Finally, I finished off the first tag by rubbing some of the Vintage Gold wax onto the tag background, splattering the tag with watered-down Black Gesso, and adding some black ribbon and a metal charm to the tag's top.


On the second tag, I've used: the Metal Stencil, a Door Knocker, a Square Mini Frame, and a Mini Frame. I started off using the Metal Stencil along with some Shimmerz Texturez in Gritty Graphite. Then, I layered cut outs and an image from the Graphic 45 Renaissance Faire collection, along with some of the black-dyed cheesecloth. I cut the Square Mini Frame in half - adding each piece under either side of the central image. Then, I used the oval Mini Frame on top of the central image. I primed all the chipboard pieces using Prima Art Basics Heavy Black Gesso. I added Prima Art Extravagance Limestone Stone Effect Paste to the Mini Frames. Once the Stone Effect Paste was dry, I sponged on some more Black Gesso. Then, I used three Prima Art Alchemy Waxes to add colour to the chipboard pieces - Old Silver Metallique Wax, Lucky Emerald Antique Brilliance Wax, and Fire Ruby Antique Brilliance Wax. Finally, I finished off the first tag by rubbing some of the Old Silver wax onto the tag background, splattering the tag with watered-down Black Gesso, and adding some black ribbon and a cameo charm to the tag's top.


Saturday, April 15, 2017

Vintage Hollywood Hat Boxes ~ Creative Embellishments

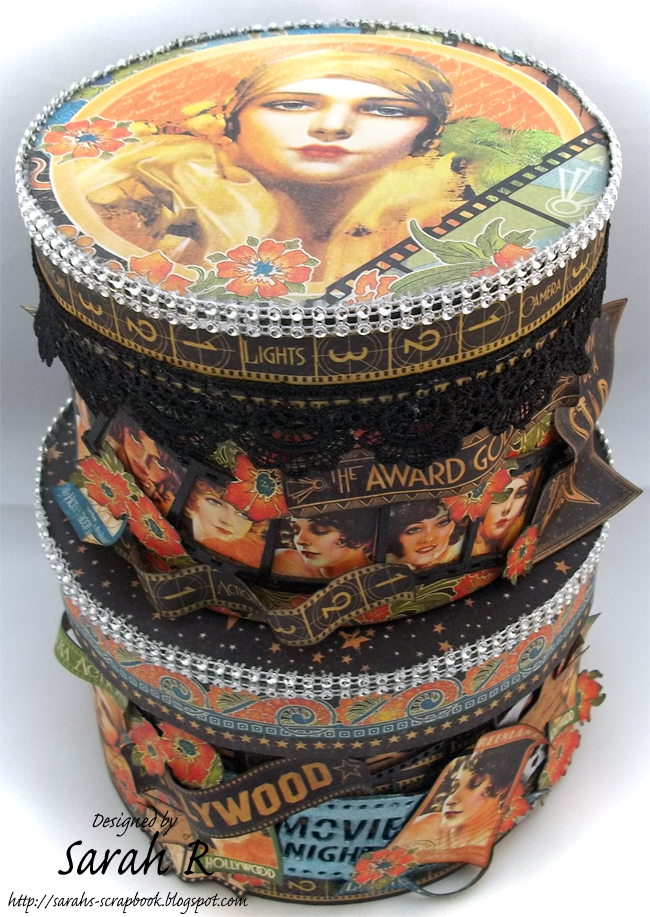
Hi there! Today I'm sharing a pair of Vintage Hollywood Hat Boxes with you! As soon as I saw these small hat boxes in a local second-hand shop, I knew I wanted to alter them. The Vintage Hollywood collection by Graphic 45, paired with some amazing Creative Embellishments chipboard, make these an amazing display item and storage space for my room! I've used papers from both the 12 x 12 and 8x8 patterned paper pads - and did lots of fussy cutting to embellish the boxes - all the paper's edges are inked with Distress Ink in Black Soot. And what is a Vintage Hollywood themed piece without some bling? So I added some rhinestone trim to both box lids as well as some black lace to the smaller box lid.


On the larger box (below), I've used one of the Movie Night tickets and the Movie Reel from the Creative Embellishments chipboard Movie Night Six Piece Set. I painted the ticket using Prima Art Alchemy Sparks paint in Magical Pond. I heat embossed the movie reel with black and silver embossing powders. I also added a strip of the numbered 'film' paper behind the film section of the movie reel.


For the smaller hat box (below), I used one of the Creative Embellishments Chipboard Wavy Film Strips. I heat embossed the film strip with black embossing powder and then fussy-cut the starlet images from the 12x12 border strip page so that the film strip sections would frame the faces.


Thanks so much for visiting my blog today! Happy Crafting!
Sarah