Sunday, April 22, 2012

If Happy Little Bluebirds Fly. . .

I finally got a layout done this month. My whole family has been sick off and on all month (including me) . . . so I was busy taking care of them and myself and hadn't found the time to scrap for weeks! *sigh* There just isn't enough time in a day, is there? Anyhow, here is a layout I did to play along with a Round Robin at The Flying Unicorn. The picture is of my son and was taken in March on the first really beautiful, warm Spring day we had. He loved going to the park and the swing and I happened to get this picture in which I think he looks so sweet and thoughtful. I used a line from the song "Over the Rainbow" as the title to go along with his thoughtful expression.
I used some of the contents from my April Scrap That! kit for this layout, which includes papers from the gorgeous "Sweet Nothings" collection by Kaisercraft. I used a page of GCD music-sheet patterened paper from my stash as the background page to tie in my song lyrics title. I edge-distressed the GCD paper and added a few random punches along the edges with a Martha Stewart edge punch and added lace peek-a-boos behind the punched sections. I edge and water-distressed the With Love page from the Kaisercraft papers and layered it on top of the base page. I added a square of distressed corrugated cardboard and matted the photo on some more Kaisercraft paper.
I used a small bluebird and tag from the "Sweet Nothings" Collectables as embellishments. I added the small bluebird to the top right of the cardboard square and added a twine swirl leading to the left side of the page.
I used the tag from the collectables and added a layer of vellum on which I had printed my title. I also added a twine bow to the tag. I used some Bazzil Basics brown cardstock and the Martha Stewart Garden Gate deep edge punch to create the double-punched border strip on the layout. I measured the depth of the punch and cut a strip of paper to allow me to punch both edges with a narrow strip down the middle....I love this look.
I fussy-cut the birdcage from the Dozen Roses Kaisercraft paper and added it to the right side of my layout with some 3-D foam adhesive. I cut a bunch of little blue flowers on my Silhouette to coordinate with the blue flowers on the birdcage and used Smooch Pearlized Accent Ink in Mocha to create the flower centres. I added the flowers to a Dusty Attic Sweet Pea border, which I cut into two sections and treated with two colours of Distress Stain (Stormy Sky and Forest Moss). Here is a close-up of some of the vine/flowers and one of the lace peek-a-boos.
Thank you so much for visiting my blog today!

Materials Used:
Patterned Papers: GCD Studios - Tina Higgins "Paris Nights" collection - music sheet; Kaisercraft - "Sweet Nothings" Collection - Dozen Roses, With Love, Collectables; Bazzill Basics Brown Cardstock; Corrugated Cardboard; Recollections Light Blue Cardstock; Vellum; Dusty Attic Sweet Pea Border; Distress Stain in Stormy Sky and Forest Moss; Smooch Pearlized Accent Ink in Mocha; Twine, Lace; Martha Stewart Punches - Garden Gate Deep Edge Punch and Arch Lattice Edge Punch; Aleene's Tacky Glue; Glue Dots - Memory Book and Mini; Memory Tape Runner XL.

Sunday, April 1, 2012

Beauty - The Paper Mixing Bowl Challenge #2

I cannot believe it is April already - this year is going by so fast! Today brings the reveal of our second challenge at The Paper Mixing Bowl challenge blog. This month we have a traditional Easter treat for you - Hot Cross Buns! Even though the recipe/sketch are Easter-inspired, you do NOT have to do an Easter layout. Since my wedding anniversary is in April, I decided to use a wedding photo for my layout this month!
Here is the recipe card for this month's challenge:
I raided my stash for this layout and used some glittery paper and some embossed paper that I had been holding onto for a while. I shifted my sketch slightly for my layout, moving my picture to the left and the journalling to the right side of the page. I managed to use all the Utensils except stitching on this layout (the bolded items in my layout description are the utensils).The Main Ingredient for this challenge was "White Icing" - meaning that white had to feature prominently in the layout - so I've used the white embossed paper, white doilies, white tags and white flowers for this element. I decided to go with a two-tone layout and chose shades of pink as my alternate colour. I punched the white paper and one of the layers of pink paper with a Martha Stewart Punch-Around-the-Page Double Loops punch. I had to use a lot of liquid glue for this layout because of the glittery papers I used - FYI glue runners and glitter paper don't go together! I added two different sizes of round doilies to my layering, using the smaller one as the mat for my photo. I added some crinkle ribbon around the edge of my photo to finish the cut-edge of the circular photo. I used Petaloo Color Me Crazy Wild Roses around the title and in the upper left corner of the layout.
I cut-out an oval doily on my silhouette and used it as the background for my title, which is a chipboard word by dusty attic. I painted the title with Distress Crackle Paint in Tattered Rose and then inked it (after it dried) with Distress Ink in Tattered Rose. I wasn't thrilled with how it had turned out so I added a coat of Smooch Pearlized Accent Ink in Shabby Pink and then a layer of Ranger Crackle Accents.
The chipboard dress form is also by Dusty Attic. I painted the dress form with Distress Crackle Paint in Tattered Rose and then inked it (after it dried) with Distress Ink in Tattered Rose. I then added Distress Stickles in (you guessed it) Tattered Rose to the "body" of the dress form. I used Smooch Pearlized Accent Ink in Illuminate on the remainder of the dress form. I finished off the neck of the dress form with three half-pearls to create a 'necklace'.
The final element of this layout is the journalling tags - which I cut on my Silhouette and printed on my printer. I had some difficulty getting the printing straight...so I might recut/reprint the tags. I added some more of the crinkle ribbon to the tag loops. The journalling is about how I felt on my wedding day and reads:
Every woman deserves to feel beautiful on her wedding day - and I did. I loved my wedding dress - I felt so happy and, if only for an evening, like the most beautiful woman in the world. Even though my fiancĂ© and I had been together for years, our wedding day was so special. I look at my wedding pictures and I remember the joy and excitement of that day and how it was the start of a new chapter in our lives. 
Thanks so much for visiting my blog today.  I hope you'll hop over to The Paper Mixing Bowl blog and play along with Recipe Challenge #2!

Materials Used:
Patterned Paper: Doodlebug Designs - Paisley Impressions Cardstock (white) and Ladybug Daydream Cardstock (Dark Pink Glitter paper); SEI Mimosa Collection - Daquiri paper; Recollections White Cardstock; Doilies by Wilton; Petaloo Color Me Crazy Wild Roses; Prima Rose Leaves; Dusty Attic Mini Words #2 chipboard word "Beauty"; Dusty Attic Dress Form #2 (small); Distress Crackle Paint in Tattered Rose; Distress Ink in Tattered Rose; Distress Stickles in Tattered Rose; Smooch Pearlized Accent Ink in Shabby Pink and Illuminate; Ranger Crackle Accents; Basic Grey Opaline Half Pearls; Crinkle Ribbon from stash; Martha Stewart Punch Around the Page Double Loops; EK Success Corner Rounder; Circle Cutter; Silhouette Die Cutter; Aleene's Tacky Glue; Memory Tape Runner XL; Glue Dots - Memory Book and Mini.

Monday, March 19, 2012

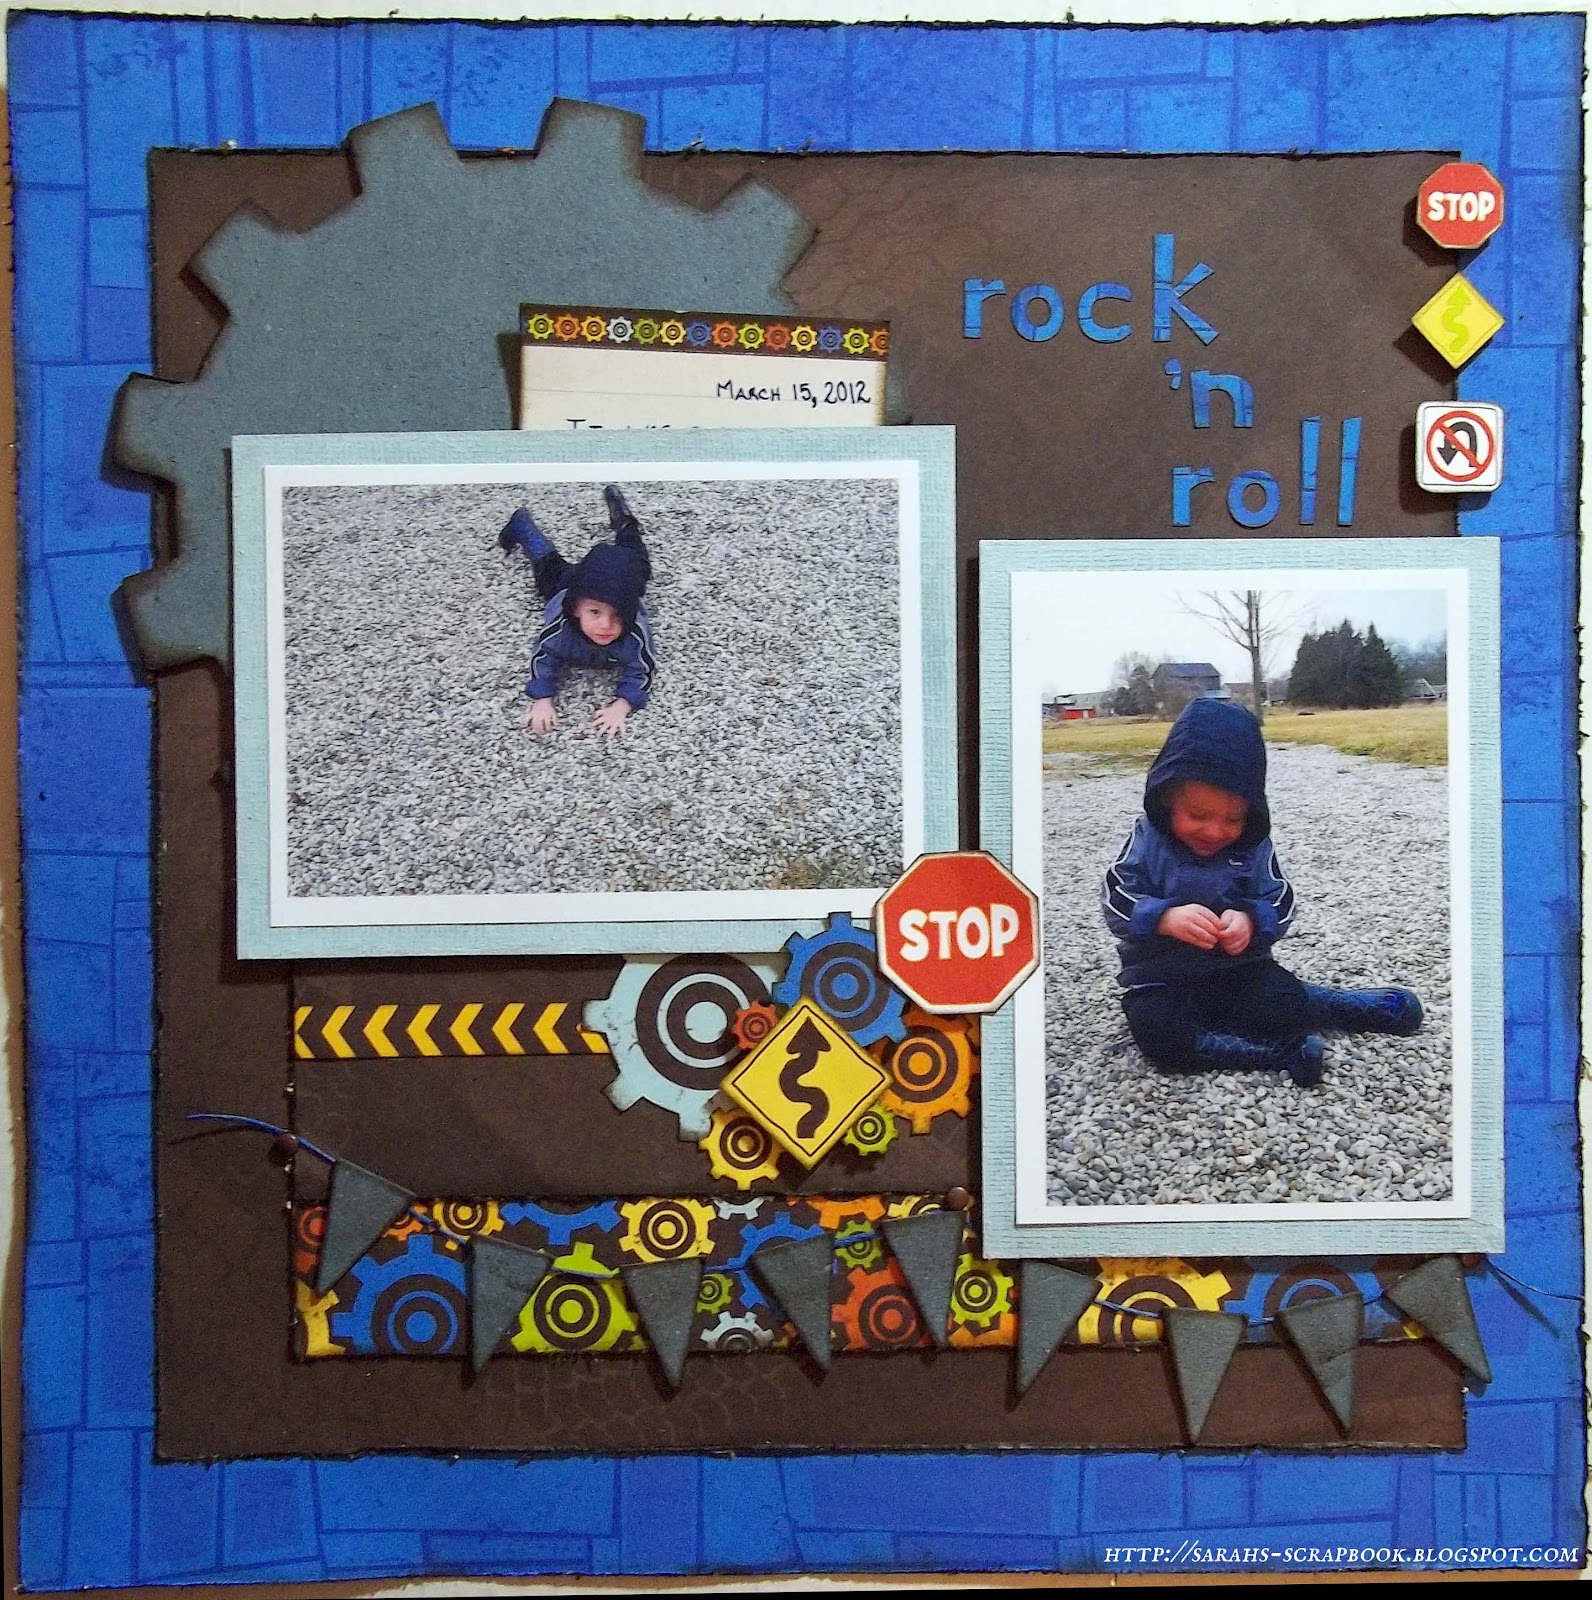
Rock 'n Roll

I finally found some time to scrap and got a new layout done tonight! This one came together really quickly, even though it is kind of outside my normal style. I used the Sassy Scrapper March Sketch for this layout and the new Bo Bunny On the Go collection (so cute and perfect for my little guy). I took the pictures earlier this week - we've had some amazing early Spring weather here in Southern Ontario, so we took advantage of the gorgeous day and went to the park (even though poor Will hasn't been feeling that great).
I followed the sketch pretty closely for this challenge - just making a couple of minor adjustments with the banner and the cluster of embellishments in the centre. All the papers, with the exception of the photo mats and journal card, are from the Bo Bunny On the Go collection. I lightly tool-distressed the edges of all the Bo Bunny papers and then inked them with Distress Ink in Walnut Stain. The photo mats are Core'dinations paper which I sanded to get the faded/distressed effect. I popped the photos up on the layout with 3D foam adhesive. I fussy cut the traffic signs and cogs from the Bo Bunny papers for the embellishment cluster in the centre of the layout and the three signs on the right side of the page and added dimension by adhering some of the cut-out elements with 3D foam adhesive.
I used a large chipboard gear from a Maya Road coaster album behind the horizontal photo and some Jenni Bowlin chipboard elements for the banner. I treated all the chipboard pieces with Distress Stain in Stormy Sky and then inked the edges with Distress Ink in Walnut Stain. I used a few nail-head brads to attach the twine for the banner. I used a double swag for the banner instead of the single swag on the sketch so that it would better frame the layout/photos.
I used a border strip from the Bo Bunny cut-outs sheet with some My Mind's Eye lined cardstock to create a journal card, which I tucked behind the horizontal photo. I'm trying to make myself journal more for my layouts - so hidden journalling is great because I don't usually like to mess-up my layouts with my (often) terrible handwriting.

Thanks so much for visiting my blog!

Materials Used:
Patterned Paper - Bo Bunny "On the Go" collection - Combo StickersCut-outs, Gears, Roads, and Signs; My Mind's Eye "Lost and Found" collection - Market Street "Love" Demure Paper; Core'dinations Essentials Collection in Vienna Lake; Jenni Bowlin Chipboard Elements; Maya Road Chipboard Gear from Gear Coaster Album; Distress Stain in Stormy Sky; Distress Ink in Walnut Stain; Karen Foster Designs Scrapper's Spool Twine in Cobalt, Blue Gel Pen; Memory Tape Runner XL; Glue Dots Memory Book; Memory Makers 3D Foam Adhesive.

Tuesday, March 13, 2012

Are you a Good Witch or a Bad Witch?

I've been so busy that I've hardly found time to scrap for over a week - but I finally finished the second layout that I had started on my all-day crop on March 3rd. This is another layout of me and my sister; this picture was taken about four years ago. It is my absolute favourite "grown up" picture of the two of us together. My sister and I both love the movie "The Wizard of Oz" and my sister teases me all the time that I am a witch and then I ask her where her flying monkeys are... Anyhow, inspired by our mutual teasing, here is my layout entitled Are you a Good Witch or a Bad Witch.
With the exception of some Black Core'dinations paper used as the photo mat, all the elements of this layout are from Graphic 45's "Wizard of Oz" paper collection. I tried to get a 'shadow-box' effect with this layout and cut the centre out of the Wicked! paper to frame the layout. I layered the frame on top of the Goblin Gazette paper using 3D Foam Adhesive. Here is a close-up of the layers/dimension in this layout.
I tool-distressed all the papers for the layout and did a lot of fussy cutting. I used an edge punch for a small strip of paper (the reverse side of the Goblin Gazette paper) that I placed inside the top edge of the frame. I used a collage of compasses that I fussy cut from the Wicked! paper as the background for the photo. I also cut the flying monkeys (gotta have flying monkeys!) from the Wicked! paper and used them as a 3D embellishment. The postage stamps are cut from the Parcel Post paper -- you'll notice that they are strategically placed to emphasize who the good witch is (me of course!) and who the bad witch is. I used some of the Emerald City paper and a paper doily that I inked with Distress Ink in Black Soot as layering and as the background for the title. I also added the Wicked Witch of the West square cut from the There's No Place Like Home paper. I assembled the layout intentionally placing all the elements so that the image of Glinda from the Goblin Gazette page at the base of the layout would still show.

For the title, I used a combination of Kaiser Craft tiny alphas in Raisin (for the words "Are you a .....or a...") and Thickers Foam Stickers from the Nightfall collection (for the words "Good Witch ...Bad Witch").

That's all for today! Thanks so much for visiting my blog!

Materials Used:
Patterned Papers - Graphic 45 "The Wizard of Oz" - Emerald CityGoblin Gazette, Parcel Post, There's No Place Like Home, and Wicked!; Core'dinations Tim Holtz Distress Collection Black Soot; Kaiser Craft Tiny Alphas in Raisin; American Crafts Thickers Nighfall Collection in Black Elm; Paper Doily; Tim Holtz Distress Ink in Black Soot; Memory Tape Runner XL; Scrapbook Adhesives 3D Foam Squares

Monday, March 5, 2012

Sisters

I went to an all-day crop on Saturday and got TWO layouts done! (Well - really about one and three-quarters - I'm working on the final embellishing on my second layout.....) It was great to have a whole day with my scrappy friends and relax and have some crafty fun. I scrapped a photo of my sister and I from when I was a baby - I think the photo was taken c.1976. I used the March sketch from the C'est Magnifique blog and The Color Room Palette #100 for this layout.
I used Graphic 45's "ABC Primer" Collection and a little bit of DCWV (the butterfly paper) for this layout. The background page, polka dot, ruler, alphabet and addition papers are all from the G45 "ABC Primer" Collection. I added the DCWV butterfly paper to make the layout a little more girly and also to bring in some of the pink for the Color Room Palette. I distressed all the papers for this layout with a tool distresser (no ink this time). I used Core'dinations Cardstock for the light pink punched border (left side of layout) and I sanded and distressed brown and blue Core'dinations paper to use as matting for the photo. I love how the blue mat really helps the picture pop on the page.
The title is inside a Tim Holtz Ornate Plate with some sanded brown Core'dinations paper behind with Kaisercraft Tiny Alpha stickers for the title letters. I fussy cut some butterflies out of the DCWV papers and added some twine linking the path of butterflies up the right side of the layout.
I made the burlap ribbon flower using a Gluber and added a wooden button (kindly donated by my friend Kelly) with a twine bow as the flower centre. The key is from the bargain bin at Michael's and the wooden fob-watch is by Kaisercraft. The tags are fussy cut from the G45 paper. The journalling reads: "Even a baby sister can be a shoulder to lean on - always there for her big sister." My sister has been going through some difficult times lately and I've tried to be there for her as much as possible even though we live a fair distance apart.

Thanks so much for visiting my blog - and please leave a comment if you stopped by - I love to read them.
Materials Used:
Patterned Papers - Graphic 45 "ABC Primer" - Happy Go Lucky, Juming Jean, School Days, and One Two Buckle My Shoe; DCWV - Butterfly Paper; Core'dinations Cardstock in Rose Embroidery, Vienna Lake and Chocolate Mocha, Tim Holtz Ornate Plate; Kaisercraft Tiny Alphas in Rum; Cosmo Cricket Gluber; Burlap Ribbon, Twine and Wooden Button from Stash; Recollections Metal Key; Kaisercraft Wooden Flourish - Fob Watch; EK Success Border Punch; Glue Dots - Memory Book and Mini; Memory Tape Runner XL.

Thursday, March 1, 2012

Cherish - The Paper Mixing Bowl Challenge #1

Welcome to my first reveal for The Paper Mixing Bowl Challenge Blog! I love participating in challenges and I am so excited to be kicking off my very own challenge blog with some great scrappy friends. I hope you enjoy this month's challenge and will hop on over to The Paper Mixing Bowl blog and play along! For my layout for this challenge, I scrapped one of my absolute favourite photos of my son....isn't he just the cutest baby ever?!?!?
Here is the recipe card for the challenge:
I have used the "main ingredient" - dark chocolate coloured paper - as the background page and in the flowers, paper ruffle and layering under the photo. I followed my sketch (i.e. the "measurements") fairly closely and I managed to use all six "utensils" on the layout too.  I used a combination of Pion Design, Fancy Pants Designs and My Mind's Eye papers for this layout. I've done lots of layering (in squares) and distressed the edges of all the papers. I also stitched a couple of the layers for a little extra detail. The title is a chipboard word by Dusty Attic that I treated with Distress Stain in Stormy Sky and Distress Stickles in Clear Rock Candy. The corner embellishments on the photo are also Dusty Attic and were treated with Distress Ink in Walnut Stain and Ranger Crackle Accents.

All the flowers for this layout are handmade and are based on a couple of tutorials you can find at Vicky Alberto's blog Simply Paper.
I also handmade the paper ruffle and added lace and a strip of distressed floral paper to complete the horizontal border on the layout. I think I might put together a quick tutorial of how I made this since I'm really pleased with how it turned out!
For my journalling, I used torn journal paper (or a close approximation using scrapbook paper) for a little handwritten letter to my son, which says: I love you more than the sun and the moon and the stars in the sky. You are my baby boy and I will cherish you always. I added some twine loops from the floral/journalling cluster to link the title and journalling visually.
Thank you so much for visiting my blog today! 
Materials Used:
Patterened Papers: Pion Design "Studio of Memories" Collection - Ornament, Anemone, Borders and Cut-out Sheet; My Mind's Eye "Lost and Found" Collection - Market St. Love Demure Paper, "29th St. Market" Collection - Mama's Curtain/Brunette Paper; Fancy Pants Designs "Lilac House" Collection - Weeping Willow and English Garden; Mulberry Paper (white flower); Dusty Attic Mini Corner #2 and Mini Word "Cherish"; Distress Ink in Walnut Stain; Distress Stain in Stormy Sky; Distress Stickles in Clear Rock Candy; Ranger Crackle Accents; Recollections Brads; Twine, Lace and Burlap leaves from stash; Glue Dots Memory Book and Mini; Memory Tape Runner XL; Terrifically Tacky Tape.

Sunday, February 26, 2012

Discovering Love - Guest Designer at Bird is the Word

I was lucky enough to be the randomly chosen Guest Designer at Bird is the Word for my entry for the "Wonder" challenge. Today, I get to reveal my layout for the February 26 challenge word - which is "Discover"; and, seeing as it is February, I decided to do a Valentine's day layout! The photos of my son for this layout are from this Valentine's day (2012). I used the February 15 sketch from Get Creative as the inspiration for the layout. When I first saw the sketch, I thought "this is not my style" and wasn't going to play along; however, I decided to challenge myself and give it a shot. I am not normally a pink hearts and cutesy cupids sort of person either - but I am so happy with how this layout turned out.
The grid pattern of the sketch reminded me of a game board - so I used games as the theme for the layout; I've included playing cards, tic-tac-toe, bingo, and a score card! I've used patterned papers, Whatnot (Winner Score Card) and Peek-a-Boo (Tic Tac Toe board) elements from Glitz Design's Love Games collection for this layout. I used two pieces of patterned paper as the base for the layout. I used a Fiskar's tear edger tool for the second layer of patterned paper and I tool-distressed the edges of both paper layers. I added a few random  border punches around the edge of the base page as well. I then layered a large square doily on top of the patterened papers. I created the quadrants of the layout by criss-crossing two border strips of Xs and Os by K&Company -- perfect for the game theme and Valentine's Day! Tucked in all around the layout are bits of ephemera from the K&Company Valentine Ephemera Die Cut Cardstock collection - lots of hearts, flowers and cupids.
I cut the "LOVE" title on my Silhouette and added the word "discovering" using some inexpensive letter stickers I had in my stash. The tickets are from another border strip that I ripped into sections and stapled using an EK Success Fastener and XOXO staple.
I layered the "Winner" Whatnot card with four Aces from an inexpensive deck of cards I picked up a Michael's and then added a small red heart doily as the mat for the photo and tucked in a small embellishment that says "I adore thee" to the left of the picture.
I used the Tic-Tac-Toe peek-a-boo from the Glitz Designs Love Games collection and layered it on top of some cream-coloured paper so it would really stand out and so I could tuck some things in behind it. I added a heart and flower to the game card using 3D foam adhesive. I tucked a cupid in behind the game card as well as a print of a playing-card themed Vintage Valentine that I found online. Here is a close-up of the journalling on the back of the Valentine, which reads:
For William: Each day I discover a new depth of love and am stirred by the feeling you inspire in me. Words are inadequate to express how I feel. The love I have for you moves me beyond myself. Love, Mummy
For the final quadrant, I layered a Jenni Bowlin Bingo Card under another small red heart doily as the mat for the second photo and added a few more pieces of ephemera to finish off the section.

That's all for today - but stay tuned for my first layout for The Paper Mixing Bowl challenge blog - we're kicking things off on March 1!

Thanks so much for visiting my blog!

Materials Used:
Patterned Papers: Glitz Design Love Games Collection - Score Card, Poppies, Damask; Glitz Design Love Games Whatnot - Winner Card; Glitz Design Love Games Peek-a-Boos - Tic-Tac-Toe Game Card; Pink Cardstock from Stash; Large Square Doily by Amscan; K&Company Adhesive Borders; K&Company Valentine Ephemera Die Cut Cardstock; Celebrate It Playing Cards; Jenni Bowlin Studio Mini Bingo Card "Lucky"; Small Red Heart Doilies by Regal Lace; Vintage Valentine found online; Black Letter Stickers from stash; Martha Stewart Edge Punch; Fiskars Edge Tearer; EK Success Fastener and Staple; EK Success Corner Rounder; Keepsakes Memories Adhesive Foam Dots; Memory Taper Runner XL; Glue Dots - Memory Book

Thursday, February 16, 2012

The Paper Mixing Bowl: Two Weeks Until Our First Challenge!

Only two weeks until the first challenge will be posted on The Paper Mixing Bowl! We are all SO excited for our first challenge and DT reveal! Are you excited about a new challenge and plan to play along? Check out the Etiquette page for the rules of play!

We've lined up an incredibly talented Guest Designer for our inaugural challenge! She is such a wonderful artist - you won't want to miss her design for Recipe Challenge #1.

See you March 1st!

Friday, February 10, 2012

The Sun is Gonna Shine Above

Happy Friday! I got another layout done - playing along again with CSI: Color, Stories, Inspiration (Case File #5) and Once Upon a Sketch (February 1st). I made this layout for my husband - it is his 40th birthday this weekend and the picture I've used is from my son's first birthday party. If you look closely, you'll see that I included a "1" sticker and a "40" sticker in the top and bottom borders of the picture to commemorate both special birthdays.
Once Upon a Sketch - February 1, 2012
I love the base page from the Bo Bunny Welcome Home collection with the "blueprint" graphic. It brought in the greens from the CSI colour palette and adds to the 'masculine' style I was trying to achieve with the overall layout. I brought in the cream, red, and eggplant colours in the photo matting and the die-cut cardstock gear. I sanded the edges of all the papers and really like how it turned out - especially around the very edge of the layout - where it helps bring attention to the journalling.

My "evidence" for this layout includes the die cut gear, which I cut from Core'dinations paper using my silhouette and sanded to get the distressed effect, as well as the pieced-together borders at the top and bottom of the pictures, which I made using cardstock stickers from Tim Holtz's Idea-ology Salvalge Stickers (Lost & Found). I also tried to incorporate some leaves by using a leafy-patterned paper in my photo-matting, but once all the layers were on and the distressing was finished, the leafy pattern became to obscured to really be visible. My "testimony" is the journalling around the edge of the page. There is a challenge this week at the Scrapbooker's Paradise Blog to use a song/song lyrics in your layout, so I'm playing along with that challenge.  I used some of the lyrics from Anne Murray's Danny's Song, which both my husband and I love. I altered the lyrics slightly and left a line out of the journalling intentionally so I could use it as the layout title. 
People smile and tell me I'm the lucky one, and we've just begun - I think we're gonna raise a son. He will be like you and me, as free as a dove; conceived in love - The Sun is Gonna Shine Above. And even though we ain't got money, I'm so in love with you honey, everything will bring a chain of love. And in the morning when I rise, you bring a tear of joy to my eyes and tell me everything is gonna be alright.
I used parts of a Maya Road Coaster Album for the chipboard gears on the layout. I inked the chipboard pieces with Colorbox Pigment Brush Pads (Chianti, Moss Green and Peony) and then stamped/heat-embossed the black flourishes. I added some metal gears and the measuring tape and number sticker borders to complete the embellishments. 

Thanks so much for your visit!


Materials Used:
Patterned Paper - Bo Bunny Welcome Home Key; Graphic 45 Tropical Travelogue Rainforest and Botanica; Core'dinations Tim Holtz & Ranger Distress Collection - Fired Brick, Victorian Velvet and Shabby Shutters; Tim Holtz Ideaology -  Salvage Stickers (Lost & Found) and Sprocket Gears; Maya Road Gear Coaster Album; Colorbox Pigment Pads - Chianti, Moss Green and Peony; Tim Holtz Distress Embossing Ink and Distress Ink in Black Soot; Ranger Superfine Detail Embossing Powder; Scrappy Cat Flourish Stamps; Kaisercraft Tiny Alpha Stickers; Zig Memory System Writer; Memory Tape Runner XL; Keepsakes Memories 3D foam adhesives; Aleene's Original Tacky Glue; Tim Holtz Ideaology Sander; Silhouette Cutting Machine.


Friday, February 3, 2012

Friends

Another new layout this week! I actually made this layout for my best friend, who was also the maid of honour at my wedding. I love this photo of the two of us - it makes me smile every time I look at it. I used CSI Case File #4 as the inspiration for the layout. I think I managed to match the colour palette pretty well - such a gorgeous, elegant colour combination! For my "Evidence", I've used wet mediums (Glimmer Mist and Ranger Enamel Accents) and Rhinestones - I usually try and use more than two but the other elements just weren't working for me on this page. For my "Testimony", I've written a personal note to my friend (tucked away in the envelope) with my reflections on our friendship and how we've changed in the 17 years that we've known each other.
The base page of this layout is by Pink Paislee and has been in my stash for quite a while; I loved how well it went with the colour palette. I misted a white fabric doily with Tattered Angels Glimmer Mist in Raven and used it as the start of my layering on the right side of the page. I added a paper doily that I inked with Distress Ink in Antique Linen to achieve the beige colour of the palette. I then triple-matted the photo using three different patterened papers - the bottom mat has the light aqua colour in the pattern, followed by a mat that brings in the gold colour and the final mat that adds some more black. I edge-distressed and inked all the papers with Distress Ink in Black Soot.

For the embellishments at the top of the photo, I fussy cut some "feathers" from a second sheet I had of the Pink Paislee paper and added some real feathers and a chipboard shape and rhinestones. The title on the photo is a Dusty Attic Chipboard word that I covered with Ranger Enamel Accents - it is the first time I have used the enamel - and I love the glossy finish!
I used some of the gold patterned paper and a smaller inked doily in a peek-a-boo at the top right of the layout and the scrunched lower left corner of the layout. I cut an envelope from the black patterned paper to use for my journalling and layered it on top of some chipboard flourishes and another feather. I added a small piece of black twine to the envelope to close it.
That's it for today! Thanks so much for visiting my blog!

Materials Used:
Patterned Papers - Pink Paislee Fetching; My Mind's Eye - Andrea Victoria Black Damask and Lost & Found Two Sunshine Adore; Lilac House Needlepoint; Fabric Doily, Paper Doilies; Distress Ink in Black Soot and Antique Linen; Creatology Feathers, Studio 18 Rhinestones; Dusty Attic Mini Word (Friends); Ranger Enamel Accents; Tattered Angels Glimmer Mist in Raven; Chipboard Flourishes from stash; Xyron Sticker Maker; Memory Tape Runner XL; Glue Dots - Memory Book. 


Friday, January 27, 2012

Things Are Always Better Than They Seem

I'm back with another layout - I really am trying to live up to (at least) one of my New Year's resolutions and take some more "me" time and get some more scrapbooking done! This week I've done a layout to play along with Case File #3 at CSI: Color, Stories, Inspiration and I've also used the January 15th sketch at Once Upon a Sketch. I'm also going to submit it for the Scrap it with a Song New Year's challenge! I love using challenges as a way to jump-start the creative process; when you have so little time to scrap - it is great to have a little outside inspiration!
The CSI Case File "evidence" I used for this layout includes: sheer ribbon, tags, a doily, and circular elements; for the "testimony", I used tags and repetition. The journalling prompt at OUAS was to focus on "Goodbye 2011" or "Hello 2012". Another resolution I made for this year was to try and focus more on the positive - 2011 was a year of ups and downs and it is far too easy to let the bad stuff keep you down. So, I need to remember that Things are always better than they seem -- and one look at my sweet little boy is a reminder that I can face anything in 2012! I journalled using lyrics from the song When I See you Smile by Bad English (wow - I'm dating myself) because they were so appropriate for this picture and this layout's message: "When I see you smile, I can face the world; You know I can do anything, when I see you smile."

I've used patterned papers by Webster's pages and Glitz Designs for this layout and edge-distessed and inked all the papers with Vintage Photo Distress Ink. The base page is from Webster's Pages Nature's Storybook collection and it has been in my stash for quite a while. I layered strips of paper from Glitz Design's Beautiful Dreamer and Laced with Grace collections and added some lace trim to edges of the top strip. I then layered a circle of Glitz Designs (Beautiful Dreamer) paper with a Doily for the central circular element of the page. The three layers under the photo include a Glitz Designs paper layer, and patterned papers by Webster's Pages (Country Estate) and Glitz Designs (Laced with Grace). I also added a couple of embossed photo corners to the photo. To complete the layering, I used two floral pieces of Glitz Design's Whatnot from the Beautiful Dreamer collection and fussy-cut another floral element from the Webster's pages Country Estate paper.
I used a Melissa Frances Vintage Tag as the title element for my layout. I didn't like the embellishments that were on it - so I removed them and added some eyelets (circular) from my stash and criss-cross threaded some sheer ribbon through them. There was a picture of a creepy little girl on the tag - so I took the frame off the tag and cut a piece of the Glitz Design Beautiful Dreamer - Floral paper to fit in the frame on the tag (flowers = not creepy). I added clusters of flowers around the tag and at the edge of the picture and finished off the embellishing with a Dusty Attic Leafy Stem chipboard piece.
I did a really simple treatment on the Dusty Attic chipboard piece - I inked the entire piece with Vintage Photo Distress Ink and then coated it with a fairly generous coat of Ranger Crackle Accents

Thanks so much for visiting my blog today. I love your visits and truly appreciate your comments!

Materials Used:
Patterned Papers - Webster's Pages: Country Estate - Breezeway, Nature's Storybook - Violette Wings; Glitz Designs: Beautiful Dreamer - Whatnot, Houndstooth, and Floral; Laced with Grace - Paper Layers, Stripe; We R Memory Keepers Paper Doily; Melissa Frances Vintage Tag; Martha Stewart Embossed Photo Corners; Dusty Attic Leafy Stem #3 (Small); Tim Holtz Vintage Photo Distress Ink; Ranger Crackle Accents; Prima Mini Roses; Recollections Boutique Fleurs - Lace Borders and Mulberry Paper Flowers; Offray Ribbon; Tags and Eyelets from Stash; Memory Taper Runner XL; Scrapbook Adhesives 3D Foam; Glue Dots (Craft and Mini).