Monday, March 19, 2018
Alice in Wonderland Junk/Vintage Journal
Hi Crafty Friends - today I'm sharing an Alice in Wonderland themed Junk/Vintage Journal. This was made for a swap in the Junk Journal Junkies Facebook Group. A video flip-through of the full journal is on my YouTube channel.
Here are a couple of photos of the outside!
Sunday, March 4, 2018
Irish Eyes Vintage Journal
Hi there Crafty Friends! Today, I'm sharing a Vintage St. Patrick's Day Themed Journal.
This Journal has a fabric cover over recycled card and is lined with muslin. A Vintage Doily wraps around the cover and a Vintage Linen Napkin has been used for pockets on the inside front and back covers. There is one signature consisting of 60+ pages, along with lots of tags, tucks, ephemera, etc. A video flip-through is available on my YouTube Channel: https://youtu.be/LY2suBwaBU4
This journal will be available for sale in my Etsy Shop: https://www.etsy.com/ca/shop/ScatteredPicturesArt
Printed elements are from Ephemoire and include the Irish Eyes Journal Kit.
Ephemoire Store: http://bit.ly/2Bv1v3L
Ephemoire Facebook Group: https://www.facebook.com/ephemoire/
Here are a few photos!
This Journal has a fabric cover over recycled card and is lined with muslin. A Vintage Doily wraps around the cover and a Vintage Linen Napkin has been used for pockets on the inside front and back covers. There is one signature consisting of 60+ pages, along with lots of tags, tucks, ephemera, etc. A video flip-through is available on my YouTube Channel: https://youtu.be/LY2suBwaBU4
This journal will be available for sale in my Etsy Shop: https://www.etsy.com/ca/shop/ScatteredPicturesArt
Printed elements are from Ephemoire and include the Irish Eyes Journal Kit.
Ephemoire Store: http://bit.ly/2Bv1v3L
Ephemoire Facebook Group: https://www.facebook.com/ephemoire/
Here are a few photos!
Thursday, March 1, 2018
Paris c. 1900 - A Cancan Dancer's Diary Vintage/Junk Journal ~ Digital Kit Available in My Etsy Store
Hi there Crafty Friends! I created this journal for a Swap in the Junk Journal Junkies Facebook Group and I'm so excited to share it because it was made using the first Digital Journal Kit I designed for my Etsy Store! The Kit is called Paris c. 1900 - A Cancan Dancer's Diary and was inspired by Paris at the turn of the 19th century and features designs based on the Paris 1900 Exhibition and the Moulin Rouge.
There is a flip-through of the completed journal on my YouTube channel.
And here are a few pictures!
There is a flip-through of the completed journal on my YouTube channel.
Friday, February 23, 2018
Mini Mixed Media Canvas ~ Creative Embellishments and Canvas Corp Brands
I started out with a 4x4 Stretched Canvas from Canvas Corp and layered Lace, Chipboard Elements from Creative Embellishments and a Resin Face Piece from Relics & Artifacts on the canvas. The Chipboard Pieces I used included: a Grunge Circle Frame, and two of the Circle Chain Frames. I painted everything with Black Gesso and then dry-brushed White Gesso on it to bring out some of the details. Next I started adding colour using Tattered Angels Mists (Chalkboard Mist in Jade and Glimmer Mists in Patina, Vintage Lace, and Suede). Once I was happy with the misting, I added the golden 'rays of light' using Tattered Angels High Impact Antique Gold Paint and Glimmer Glam in Golden Goddess. I finished off the piece by adding some Rose Gold wax to the lips of the resin face piece.

Thursday, February 22, 2018
Shabby Rose Mixed Media Altered Box and Mini Vintage/Junk Journal ~ with Video Flip Through
Today, I'm sharing a Mixed Media Altered Box and Mini Vintage/Junk Journal. The box is approximately 4”x6” and the Mini Journal (inside) is approximately 5”x3.5”. The Journal has a fabric cover over recycled card and is lined with muslin. There are two sewn-in signatures with a total of 40 pages and lots of journaling space and ephemera. You can find a video flip-through of the journal on my YouTube Channel: https://www.youtube.com/watch?v=BCZMTR3xoOM&t=7s
I will be listing this box and journal for sale in my Etsy Shop:
https://www.etsy.com/ca/shop/ScatteredPicturesArt
Printed elements are from Ephemoire and include the Harlequin Roses Journal Kit, Shabby Roses Art Journal Cards and He Loves Me Romantic Angel Elements.
Ephemoire Store: http://bit.ly/2Bv1v3L
Ephemoire Facebook Group: https://www.facebook.com/ephemoire/
I will be listing this box and journal for sale in my Etsy Shop:
https://www.etsy.com/ca/shop/ScatteredPicturesArt
Printed elements are from Ephemoire and include the Harlequin Roses Journal Kit, Shabby Roses Art Journal Cards and He Loves Me Romantic Angel Elements.
Ephemoire Store: http://bit.ly/2Bv1v3L
Ephemoire Facebook Group: https://www.facebook.com/ephemoire/
Wednesday, February 14, 2018
Sweetheart - Baby's 1st Year February Layout ~ Creative Embellishments
Hi there! I'm back with a new instalment in my "Baby's First Year" series of layouts. I've used a combination of several Graphic 45 paper collections (A Place in Time, Children's Hour, and Time to Flourish) to create this layout, along with a Creative Embellishments Sweetheart chipboard title from the Valentine's Hashtags and a wood veneer heart from the Lover's Hearts Set 2.

I layered my papers and cut-out elements from the papers (all inked with Distress Ink in Vintage Photo), added the sweet photo of my son and then added the title and wood veneer heart to finish off the layout. The title was a bit too long, so I ended up cutting the hashtag off of it. I painted the sweetheart title and the heart with Prima Art Extravagance Metallique Paint in Royal Red and then inked them with Distress Ink in Vintage Photo. Here are some close-ups/different angles so you can see all the layers and details!

Wednesday, January 31, 2018
New Beginnings - Baby's 1st Year January Layout ~ Creative Embellishments
Hi there! Today I'm back with a new installment in my "Baby's First Year" series of layouts. I've used a combination of several Graphic 45 paper collections (A Place in Time, Children's Hour, Mother Goose, and Time to Flourish) to create this layout, along with two Spoons from the Creative Embellishments Small Cutlery set.

I painted the spoons with Prima Art Extravagance Metallique Paint in Silver Spoon and then dry-brushed two tones of Metallique blue paint (Midnight Sky and Rich Turquoise) on the handles. Once the paint was dry, I added some Vintage Photo Distress Ink to the spoons to make them look slightly tarnished. Here are some close-ups and different angles so you can see all the layers and details!

Saturday, January 20, 2018
Vintage French Tags ~ Creative Embellishments
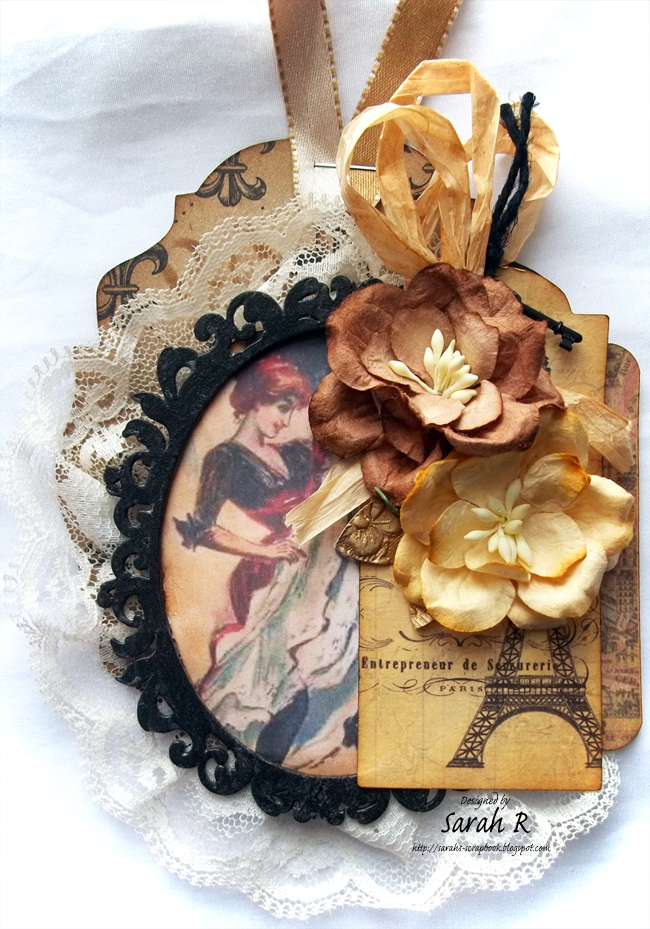
Hi There! Today I'm sharing a pair of Vintage French Tags created using two of the small Fancy Oval Frames from Creative Embellishments and papers/embellishments from Canvas Corp Brands. All the papers are inked with Distress Ink in Vintage Photo.
I used the Tim Holtz Baroque Die to cut the base of the tags from a sheet of Canvas Corp Black and Kraft Fleur de Lis paper. I printed the vintage Cancan dancer images and used the Creative Embellishments Frames on them. I painted the frames with Black Acrylic Paint and added a very fine crackle texture on them. I used a 7 Gypsies Junque Pack to create the paper layers and small tags. I added some 7 Gypsies Rub-ons and Miniature Keys to embellish the tags, as well as some paper flowers from Wild Orchid Crafts and some raffia, lace and twine from my stash. Finally, I punched some leaves from some scraps of Canvas Corp Embossed Burnished Floral paper that I had left in my stash and added them to the flowers. Here is a close-up of each tag:
Tuesday, January 16, 2018
"It's Elementary" - Passport Size Planner/Journal ~ Creative Embellishments
Happy New Year! Today, I'm sharing a little project to help keep me organized this year - a Passport-size Planner/Journal using the amazing Creative Embellishments Passport Journal Cover. I used the Graphic 45 Master Detective collection to decorate the journal cover - all the papers are inked with Distress Ink in Vintage Photo. I've made this little journal in a Traveler's Notebook style so that I can update/replace the calendar/notebook as needed!
I'm calling this Notebook "It's Elementary" as I love everything 'Sherlock Holmes' related - and it is elementary that I NEED something like this little planner to keep my organized throughout the year. I covered the notebook with papers from the 12x12 Patterns & Solids and used cut-outs and a border from the 8x8 Patterned Paper to decorate the cover and I added a Graphic 45 chipboard element to the closure elastic.
I added a pocket from the Graphic 45 Tags & Pockets to the inside of the front cover and left it open behind so that there are actually two little tuck spots inside the front cover. I made a little cover for the planner from some of the Patterns & Solids paper and reinforced the spine with some Tim Holtz Decor Tape - this will help the cover stand up to being pulled in and out of the elastic binding. I decorated the front of the planner section with a tag from the tags and pockets. I found a free printable Passport-size 2018 calendar at Lady Falcon Travelers - and it is the PERFECT size for this journal.
The Passport Journal Cover is also the perfect size to hold a mini composition book. (I found them at Walmart in packs of 3 for less than $2!) I covered the front of the composition book with paper from the Patterns & Solids and covered the back with plain black cardstock. I'm going to use the notebook to jot down project ideas so I never forget one of my 3 a.m. moments of inspiration!
I added a side tuck spot to the back cover and made a coordinating pen holder using a small black bulldog clip and some green elastic.
Thanks so much for stopping by my blog today - I hope 2018 is off to a fantastic start for you!
Subscribe to:
Posts (Atom)